A few notes before we get started
The purpose of this page is to provide an overview of the project in a way that demonstrates my abilities to potential employers, associates, or colleagues. I am working on a series of posts which will detail our research, plans, lessons learned, schematics, and results for the benefit of other Skoolie enthusiasts – Take a look at the topics page or the Sheila category to find all the bits which have been posted so far.
I should point out that Sheila is not the bus’ official name. There was some discussion about a name for the bus but no consensus was ever reached; as we had no shortage of other issues to sort out during the course of this project the name discussion was dropped and so we all refer to the bus using different names. One of the names I had suggested was Sheila, in homage to the tank in the machinima series Red vs. Blue, and #SheilaTheBus isn’t widely used so it’s easy to reference posts across various platforms.
Project drivers
This project was born out of a desire I shared with some friends which was to experience as many mountain biking trails as possible across Canada. Rough cost estimates for doing such a trip with our existing vehicles were prohibitively expensive but we figured that using an RV would cut out a large chunk of the expenses. We briefly considered renting an RV for the trip but we quickly realized it wouldn’t answer all our needs and, if we made do, there was a high likelihood that our use would result in a lot of damage to the interior of the RV and our bikes. This wasn’t an insurmountable problem, however, as a good friend of mine and I both had preexisting desires to convert a bus into a motorhome. This project gave us the opportunity to fulfill some of our childhood dreams, build a motorhome which satisfies our specific needs, and experience as many of the trails Canada has to offer as our time allows.
We started doing research in the summer of 2015 and quickly determined that the project wouldn’t be inexpensive but could be affordable. We spent many months researching the requirements, elaborating and prioritizing our needs, discussing designs, and finding other parties interested in joining us. As happens on these types of projects, finding parties interested in joining you on your epic adventure is easy, actually having them contribute their time and resources is a wholly different matter.
Besides the standard (aka legal) requirements for an RV (beds, kitchenette, passenger seating, lavatory, and a common area we needed our RV to provide us with a secure way to transport as many bikes as possible, a way to transport wet, muddy, and/or smelly gear (without making the living space unlivable), and a vehicle we could park in busy parking lots or remote areas without fear that it wouldn’t be there when we returned.
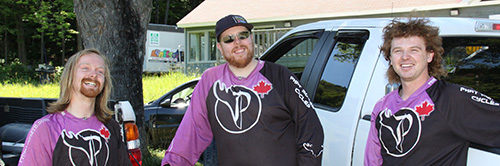
The team
Chris had dreamed of touring the country in a bus riding bikes from the day he first saw Drop In TV fifteen years prior. Chris and I had known each other for years during which we collaborated on a few projects and traveled to various destinations in the pursuit of biking and skiing excellence. During the planning phase of the project Chris was in the second year of the Geology program at Carleton University; for the summer of the project he was working full-time on the mountain bike trail crew at Camp Fortune.
Kevin was super excited about the cross-country road trip and the associated riding. Kevin had been friends with Chris for many years and had joined us on a variety of biking adventures. He is a professional welder and fabricator which are skills in high demand for this type of project. He was working full-time as a welder throughout the project.
I had fantasized about converting a bus into an motorhome since I was a teenager and a friend’s uncle had done something similar. While I was involved with this project I was working full-time as a information technology resource at a project management consulting company.
Despite Chris and I both having previous aspirations to embark on this type of project, I can’t help but question if either one of us would have embarked upon it solo or if we’d have seen it through to completion without each other’s help. I can remember several times during the research and planning phase where we kept each other motivated after hitting roadblocks.
The plan
While we had been preparing and doing leg work through the fall and winter, we only felt confident enough to start shopping for a bus in the spring. Chris’ scholastic schedule meant we needed to be home from our initial road trip in early September. That gave us three months to perform the conversion and about five and a half weeks to enjoy the fruits of our labour. When you consider that we all had full-time jobs to deal with, we could each only realistically invest about fifty hours in the project each week. The schedule was ambitious but not impossible.
A standard forty-foot school bus provides almost 220 square feet of living space which sounds like a huge space but when you start laying stuff out it’s amazing how quickly that space gets eaten up. We came up with eight different layouts before we had one which we though best served our needs without greatly increasing the scope of the project.
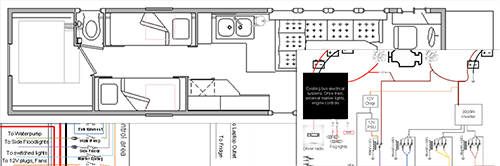
We made the decision to not use on-board propane appliances, to minimize the number of exterior modifications to the bus body, and complete the work with a suitable degree of finesse in order to help mitigate any issues in obtaining our safety certificate and insurance. The plans included a living area with a large couch and table, additional fold-out seating, and an entertainment centre; a kitchenette featuring running water, a fridge, a microwave, and lots of storage space; four bunk beds with integrated storage; a lavatory with a chemical toilet; a vented bike and gear storage room with the capacity to safely transport twelve bikes; and four domestic electrical power buses which could be powered by on-board batteries or external sources. I insisted that the vehicle systems had to be easy to use – such as ensuring that electrical loads would switch from on-board power sources to external ones automatically when they became available. Another part of the plan where I was adamant was that, while the final vehicle had to be secure, the security couldn’t negatively affect the safety.
While we had most of the plan ready before we purchased the bus, the plan evolved throughout the process in response to available materials and rapid mock-up testing during the conversion phase. Finding an entire set of kitchen cabinets for free on Kijiji saved us a lot of time and materials in the kitchenette, luckily we had no problems making the available pieces best fit our designs and the available space.
The conversion
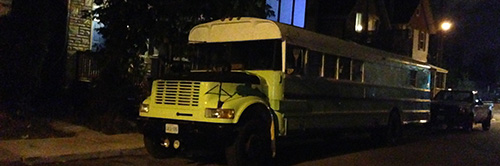
The project officially kicked off with the purchase of a used school bus in May of 2016. We elected to buy a 2003 International 3800-based bus with a Corbeil body from a local salvage yard. The bus had come from a semi-rural area and had about 313,500km spread over 9,500 services hours. Part of the deal for the purchase was that the bus would need to be delivered to a friend’s garage in Chelsea, QC.
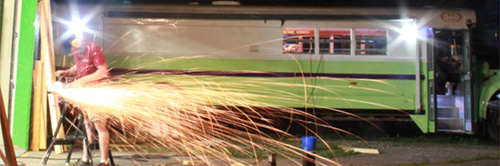
The first major step in the conversion was to strip out the twenty four original passenger seats, two thirds of the windows, the rear heater, and related hoses and wires. While that took care of the interior of the bus, we needed to cover up where the windows had been, remove all school-bus-specific signage and lighting elements, remove all unwanted decals, and repaint the exterior of the bus.
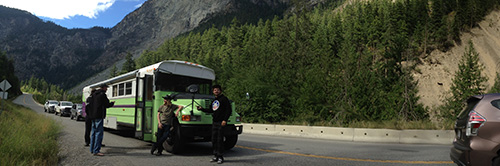
We decided to make the roof and upper parts white in order to minimize solar heating. The hood kept its matte black finish in order to ensure no glare for the driver and the bumpers and lower trim was kept glossy black for aesthetic reasons. We agreed that green and purple would be a good colour scheme for the bus, though the triangular pattern was improvised during the painting process (though is mirrored well on both sides of the bus as the transitions align with structural elements.) The vehicle is now registered in the province of Ontario as a multicoloured International motorized home.
Once the passenger area was empty we were able to commence building the new partitions and furnishings while installing, rerouting, and integrating the new and old electrical systems. It was a complex exercise as essential vehicle electrical systems such as tail lights were run through the passenger compartment alongside the interior lights and the removed flashing signal systems. We wanted to maintain the existing tail lights but remove the flashing stop lights and change the ceiling lights to be powered off our domestic power system and controlled individually by area. As previously noted safety was an important consideration in the project so, while there were now cabinets where the emergency exit windows were located, we elected to relocate one of them to the lavatory, maintaining four exits.
During the conversion a few delays were encountered which resulted in some features being rethought or deferred and the overall conversion taking three and a half months instead of the three months originally planned, however these were the risks involved in embarking on a project of this scope and we had prepared ourselves accordingly. Once the conversion was complete, we were able to get the vehicle professionally appraised and inspected for a safety certificate which allowed us to complete the registration and obtain insurance for the vehicle.
The maiden voyage
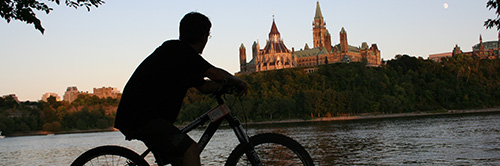
Due to delays during the conversion our six week maiden trip was cut to just under four weeks in length. While this change in itinerary forced us to cut some destinations from the trip, the basic premise of the trip remained the same – we were traveling from Ottawa, ON to Ottawa, ON using the scenic route which takes us through British Columbia.
In many ways the trip had more risks associated with it than the conversion did. Had anything calamitous happened to the vehicle during the conversion, we’d potentially be out some of the money invested and lose the time we had invested. Once we left the region we call home a calamitous event gets to be much harder to deal with since we’d no longer have access to the resources we are accustomed to. The vehicle is our mechanism of transportation, living area, and storage. Losing access to it or having to return home without it would have been a complex task. In order to mitigate a variety of risks we obtained a variety of spare engine and electrical components, obtained hard copies of a variety of relevant service manuals, and packed the various tools required to diagnose and repair some of the issues we anticipated that we could encounter.
Our trip included stops in Fernie, Nelson, Rossland, North Vancouver, Whistler, Kamloops, and Revelstoke. A more detailed recounting of where we visited, what we rode, and who we met wouldn’t fit into the scope of this document but details of this and our future trips and experiences will get posted under the Sheila’s Travels tag.
Post mortem
Our maiden voyage was a success. We drove just over ten thousand kilometers and rode several hundred kilometers of amazing mountain bike trails. Major issues the vehicle encountered during the trip were two blown fuses, a broken door lock, and a zipper failure of one of our drive tires. We also compiled a list of about forty other improvements which could make life on the road easier.
Sheila is still around and has covered a couple thousand kilometers since our maiden voyage. We are continuing to improve the vehicle for each subsequent trip. In the mean time I’m working on publishing some of my research and our lessons learned so that others can benefit from our work.
When putting together my professional portfolio of projects I’ve worked on, I decided to include this project, not because I have aspirations to become a professional RV builder (though I can’t say it wouldn’t be an intriguing line of work), but because it demonstrates my adaptability, creativity, leadership, and the degree to which I have internalized the core concepts of project management and risk mitigation to the point that I employ them in my non-professional life.